A boat rarely fails at the perfect moment. A weak battery appears after rain, while a clogged fuel filter surfaces three miles offshore. Learning How to fix common boat problems quickly can protect your time, equipment, and passengers.
The U.S. Coast Guard’s 2023 Recreational Boating Statistics recorded 4,064 recreational boating accidents, 556 deaths, and 2,678 injuries. Mechanical failure was not the only cause, but poor preparation often makes minor faults dangerous. BoatUS Towing reports also regularly identify engine problems, battery failures, fuel issues, and overheated cooling systems among the most common assistance calls. These patterns show why practical diagnosis matters more than guesswork.
Marine surveyor and author Steve D’Antonio offers a useful professional reminder: “Maintenance is not a cost; it is an investment in safety.” His point is easy to test. A clean battery terminal, firm hose clamp, and spare impeller may prevent a long drift toward shore. Still, not every problem has a quick fix. I have seen owners replace a fuse repeatedly without checking the short circuit underneath. That shortcut wastes money and increases risk.
This guide focuses on realistic troubleshooting. You will learn how to inspect starting systems, cooling water, fuel delivery, bilge pumps, steering, and electrical connections. Each section emphasizes symptoms, likely causes, safe temporary measures, and proper repairs. Keep tools dry. Label disconnected wires. Stop when heat, fuel vapors, or electrical arcing appears. A rushed repair can create a larger failure, and that uncomfortable lesson deserves attention.
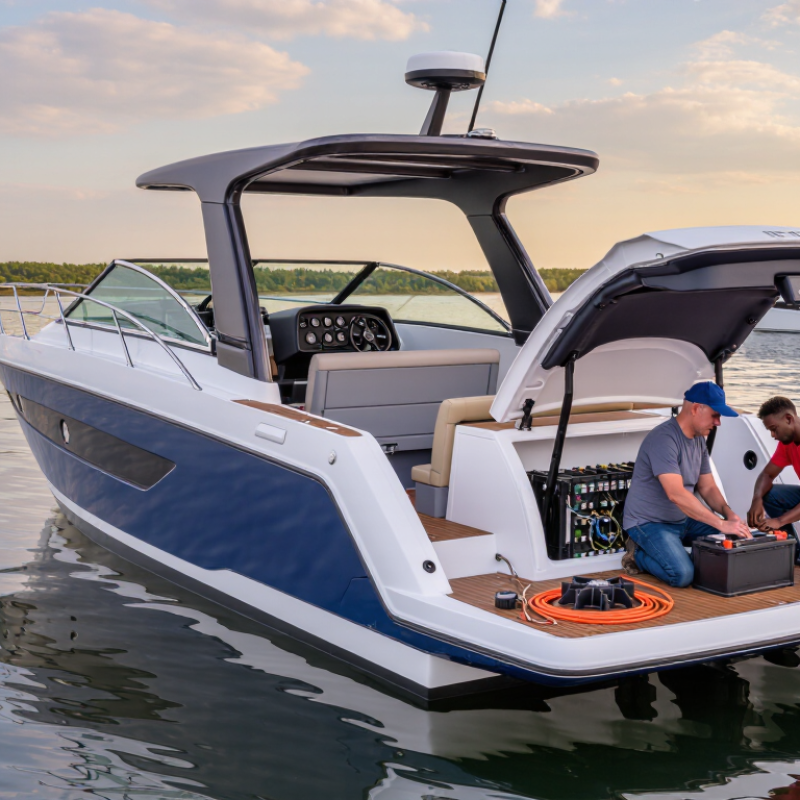
When a boat fault appears, protect people before protecting the schedule. ABYC safety standards offer practical guidance for electrical, fuel, and bilge systems. If you smell gasoline, see smoke, or hear arcing, stop immediately. Shut down ignition sources, ventilate safely, and move everyone away from danger. Do not restart the engine to “check again.” That choice can turn a small fault into a fire.
For a dead electrical circuit, switch off the main disconnect before inspecting anything. Check the battery terminals, cable damage, and the correct overcurrent protection. ABYC E-11 guidance emphasizes secure conductors, proper fuses, and protected connections. Never replace a fuse with wire or a larger fuse. Keep it simple. A warm cable is a warning, not a diagnosis. Isolate shore power before touching alternating-current equipment, and use a qualified marine technician when the fault remains unclear.
For an engine that will not start, check fuel level, ventilation, battery voltage, and emergency shutoff controls. Keep hands clear of belts and moving parts. A bilge pump that runs continuously may indicate water ingress, a stuck float switch, or a wiring problem. Find the source before cruising. Record the smell, sound, temperature, and time of failure. This detail helps a technician work faster. I sometimes find that rushed checks miss loose connections. That is worth remembering. Use the current ABYC edition, because technical guidance can change, and local requirements may add further duties.
A marine battery that reads flat may not be dead. Measure it correctly before replacing it. Turn off every onboard load, then disconnect the negative cable. Charge the battery with a suitable marine charger in a ventilated area.
Do not charge a swollen, cracked, leaking, or unusually hot battery.
Let the battery rest for at least six hours after charging. Twelve hours gives a more reliable result. Place a digital multimeter across the terminals. A healthy, fully charged 12-volt battery should measure close to 12.6 volts at rest.
Check the terminals too. White or green corrosion can create false readings.
A 12.6-volt reading does not prove perfect capacity. Apply a proper load test, or check voltage while starting the engine. If voltage drops sharply, the battery may have internal damage.
Stop testing if cables become hot.
I once trusted a fresh voltage reading too quickly; the battery failed under load later. That mistake taught me to test capacity, not appearance.
For flooded batteries, inspect fluid levels only when the design allows access. Sealed batteries should never be opened. Record the voltage, resting time, temperature, and load result. Those details make replacement decisions more reliable.
How to Fix Common Boat Problems Quickly
Clear Overheating Engines by Verifying Raw-Water Flow and Impeller Wear
An overheating marine engine often starts with a simple interruption in raw-water flow. Shut the engine down before investigating. Steam, a temperature alarm, or weak exhaust discharge demands immediate attention. The U.S. Coast Guard recorded 3,844 recreational boating incidents in 2023, so disciplined troubleshooting matters during stressful situations.
Check the seacock, intake grate, strainer, and hose for weeds, mud, or collapsed sections. Open the strainer carefully, because trapped water can escape under pressure. Then inspect the raw-water pump impeller. Missing vanes, hardened rubber, or a distorted hub indicate replacement is necessary. Small fragments may travel downstream and block cooling passages. Do not run the pump dry, even briefly. It can damage the impeller quickly.
ABYC engine-cooling guidance emphasizes maintaining dependable seawater circulation and secure hose connections. BoatUS Foundation maintenance guidance also recommends regular inspection of strainers, belts, hoses, and cooling components. Service intervals vary by engine and operating conditions, not just calendar time. A heavily used boat may need earlier inspection. I have seen a clean strainer hide a damaged impeller, which is an easy mistake. After repair, run the engine at idle and confirm a steady exhaust-water flow before increasing speed. Temperature should rise gradually, not spike. Record the inspection date and operating hours. That simple note can expose a repeating problem.
| Problem or Symptom | Likely Cause | Quick Verification | Typical Finding | Immediate Action | Priority | Preventive Interval |
|---|---|---|---|---|---|---|
| Engine temperature rises above its normal operating range | Restricted raw-water flow, damaged impeller, blocked intake, or closed seacock | Check the seacock, intake strainer, discharge stream, and engine temperature indicator | Weak or absent water discharge, especially at idle | Reduce engine speed or shut down the engine; inspect the raw-water circuit before restarting | High | Inspect before every trip; service at least annually |
| Little or no water exits the exhaust | Worn impeller, air leak on the suction side, blocked strainer, or obstructed intake | Confirm the seacock is open and inspect the strainer basket, cover seal, hose, and impeller | Intermittent flow or a dry exhaust outlet | Do not continue running the engine dry; clear the blockage and replace damaged parts | High | Check flow at every start; replace the impeller according to service condition |
| Raw-water pump produces uneven or pulsing flow | Impeller vanes are cracked, permanently bent, or missing | Remove the pump cover and compare all vanes for shape, flexibility, and completeness | Vanes remain bent in one direction or fragments are found downstream | Install a new impeller with the correct lubricant and remove loose fragments from the system | High | Inspect during annual maintenance or sooner after a dry-running event |
| Engine overheats after running briefly with the seacock closed | Impeller damage caused by insufficient lubrication and water flow | Inspect the impeller, pump cover, gasket, and raw-water hoses | Scorched, brittle, or deformed impeller vanes | Replace the impeller and gasket; flush the raw-water circuit if vane pieces are missing | High | Verify seacock position before every engine start |
| Temperature is normal at cruising speed but high at idle | Partially blocked intake, restricted strainer, weak pump efficiency, or worn impeller | Compare discharge flow at idle and higher speed; inspect the intake and strainer | Flow improves with engine speed but remains below normal at idle | Clean the intake and strainer; replace the impeller if wear is visible | Medium | Clean the strainer regularly and inspect it after operating in debris-filled water |
| Raw-water strainer contains debris | Seaweed, plastic, mud, shells, or other material blocking the intake path | Close the seacock, remove the strainer cover, and inspect the basket and sealing surface | Reduced basket openings or debris packed around the intake | Clean the basket, check the cover seal, reopen the seacock, and confirm water flow | Medium | Inspect before departure and after navigating through floating debris |
| Water leaks around the raw-water pump | Worn pump cover, damaged gasket, loose fasteners, or shaft seal failure | Inspect for droplets, salt deposits, scoring, and loose cover screws while the engine is stopped | Water tracks, corrosion marks, or a visibly worn cover plate | Replace the gasket or worn pump components; tighten fasteners evenly to the specified torque | Medium | Inspect during routine engine-space checks |
| Temperature warning activates intermittently | Low coolant level, unreliable temperature sensor, restricted raw-water flow, or loose electrical connection | Check coolant level when the engine is cold, verify raw-water discharge, and inspect sensor wiring | Warning changes with engine speed, vibration, or movement of the wiring | Stop if actual temperature is high; repair the cooling fault before relying on the warning system | High | Check coolant level and warning indicators before each trip |
| Impeller has missing vanes | Age-related fatigue, dry running, incorrect installation, or foreign-object damage | Count the vanes and inspect the pump outlet hose and heat exchanger inlet | Fragments may be lodged in a hose, elbow, or heat exchanger passage | Replace the impeller and locate all missing pieces before operating the engine | High | Inspect whenever an impeller is removed; replace after severe dry running |
| Cooling performance remains poor after impeller replacement | Blocked heat exchanger, thermostat fault, damaged hose, trapped air, or insufficient coolant | Confirm raw-water flow through the system and inspect hoses, thermostat operation, and coolant level | Strong discharge flow but persistent high engine temperature | Stop repeated test runs and diagnose the closed-cooling circuit or heat exchanger | High | Flush and inspect the cooling system according to the engine service schedule |
| Engine returns to normal temperature after reducing load | Cooling system capacity is marginal due to restricted flow, fouling, or low coolant circulation | Compare temperature under light and heavy load while monitoring raw-water discharge | Temperature rises mainly during sustained high-power operation | Limit engine load until the intake, impeller, heat exchanger, and coolant system are inspected | Medium | Inspect cooling passages and service fluids at scheduled maintenance intervals |
Fuel-system failures can turn a quiet afternoon into a dangerous delay. The U.S. Coast Guard’s 2023 Recreational Boating Statistics recorded 3,844 boating accidents and 556 deaths. Mechanical problems are not always the main cause, but leaking fuel can create fire, explosion, and engine-stall risks.
Replace cracked, soft, swollen, or fuel-smelling hoses with hose carrying the correct USCG Type A designation. Confirm its rating matches gasoline, diesel, pressure, and installation location. Push each hose fully onto its fitting. Use corrosion-resistant clamps sized for the hose, not oversized hardware that bottoms out before sealing. Two clamps may be appropriate where the applicable standard requires them. Keep clamp edges away from wiring and moving parts. I have seen “tight” clamps leave a narrow leak path. Appearance can mislead.
Tips: Inspect hoses before every trip. Rub a clean cloth along each connection. A fresh fuel odor deserves attention. Check clamps for rust, distortion, and loose screws. Follow the hose manufacturer’s instructions and the current ABYC standards, especially for fuel-tank connections and ventilation. The Coast Guard’s Boat Operations and Training guidance also emphasizes pre-departure checks, yet owners often skip them when the engine starts normally. That shortcut is understandable, but it is not reliable. Run the blower when required, open the engine compartment, and look for dampness before starting. Never test for leaks with a flame. Use ventilation, absorbent pads, and proper disposal methods.
Electrical faults often begin with a small voltage loss hidden inside a long cable run. ABYC E-11 recommends limiting voltage drop to 3% on critical circuits, including navigation lights, bilge pumps, and communication equipment. On a 12-volt system, that allows only 0.36 volts of loss. On a 24-volt system, the limit is 0.72 volts. Measure the complete circuit length, including the return path. Then check current demand, conductor size, terminals, and switches.
A 10-amp pump can appear healthy at the panel but fail under load near the stern. Use a multimeter while the circuit operates. Measure voltage at the source, then at the equipment terminals. The difference reveals the actual drop. Clean, tight connections matter. Corrosion adds resistance, even when a terminal looks acceptable. I have found loose negative connections causing more trouble than damaged positive cables. That result is easy to miss.
The U.S. Coast Guard’s 2023 Recreational Boating Statistics recorded 3,844 boating accidents, 556 deaths, and 2,126 injuries. The report does not isolate every electrical fault, but dependable essential circuits support safer operation. ABYC guidance also separates noncritical circuits, where a 10% drop may be acceptable. That distinction should not excuse poor installation. Recheck calculations after upgrades. Extra equipment changes the load, and an older cable may no longer be adequate. Small voltage losses become obvious when the battery is cold, the pump starts, or several devices run together. Expect imperfections. Test under real conditions.
The chart shows example calculated voltage-drop values for common 12-volt boat circuits. ABYC guidance commonly uses a maximum voltage drop of 3% for critical circuits, such as bilge pumps, navigation equipment, and communication systems. Excessive drop can reduce equipment performance, so check cable length, conductor size, terminals, and connections when a circuit exceeds the limit.
Stop immediately. Shut down ignition sources, ventilate safely, and move everyone away. Do not restart the engine to check again.
Switch off the main disconnect first. Check battery terminals, damaged cables, fuses, and protected connections. Never replace a fuse with wire or a larger fuse.
A warm cable signals a possible electrical problem. It is not a complete diagnosis. Stop testing if heating increases.
Check fuel level, ventilation, battery voltage, and emergency shutoff controls. Keep hands away from belts and moving parts. Small details matter.
Possible causes include water entering the bilge, a stuck float switch, or faulty wiring. Find the water source before cruising.
Turn off onboard loads and disconnect the negative cable. Charge it with a suitable charger in a ventilated area. Do not charge damaged batteries.
After charging, let the battery rest for six to twelve hours. About 12.6 volts suggests full charge. Around 12.0 volts indicates serious discharge.
No. Perform a proper load test or observe voltage during engine starting. A sharp voltage drop may indicate internal damage. I once trusted voltage alone, and the battery later failed under load.
How to fix common boat problems starts with a fast, safety-focused assessment. Begin by triaging the fault according to recognized marine safety practices, then isolate the affected system before making repairs. For a flat battery, allow it to rest and test its voltage; a healthy 12-volt marine battery should read about 12.6 volts when fully charged. If the reading remains low after proper charging, replacement may be necessary.
Engine overheating often results from restricted raw-water flow, a clogged intake, or a worn impeller, so inspect each area carefully. Fuel problems should be addressed with marine-rated, compliant hoses and securely tightened clamps to prevent leaks. Electrical faults can be reduced by checking connections, protecting wiring, and keeping voltage drop within approximately 3% on critical circuits. Always disconnect power before electrical work, use suitable replacement parts, and test the boat safely after every repair.

Green Boat